
This is about the coat I made for the BurdaStyle Sewing Handbook, my name there, by the way, is ajtak7171.

THIS FIRST POST gives you an overview, initial sketches and an outline of how many days it took me and what I did on each day.
THIS SECOND POST gives you the detailed description of the changes I made from the original pattern, and details of days 1-4, with close-up photos of the sewing process and whatever bits of insight I can give.
AND HERE FOLLOW DAYS 5 - 8:
Half days = 2-4 hrs. of work
3/4 days = up to 6 hrs.
whole days = 8 - 10 hrs.
I always started
the day with cutting out the pattern pieces that I would need for the next
step. Which meant about an hour of cutting in the beginning of each day...
(click to read on!)
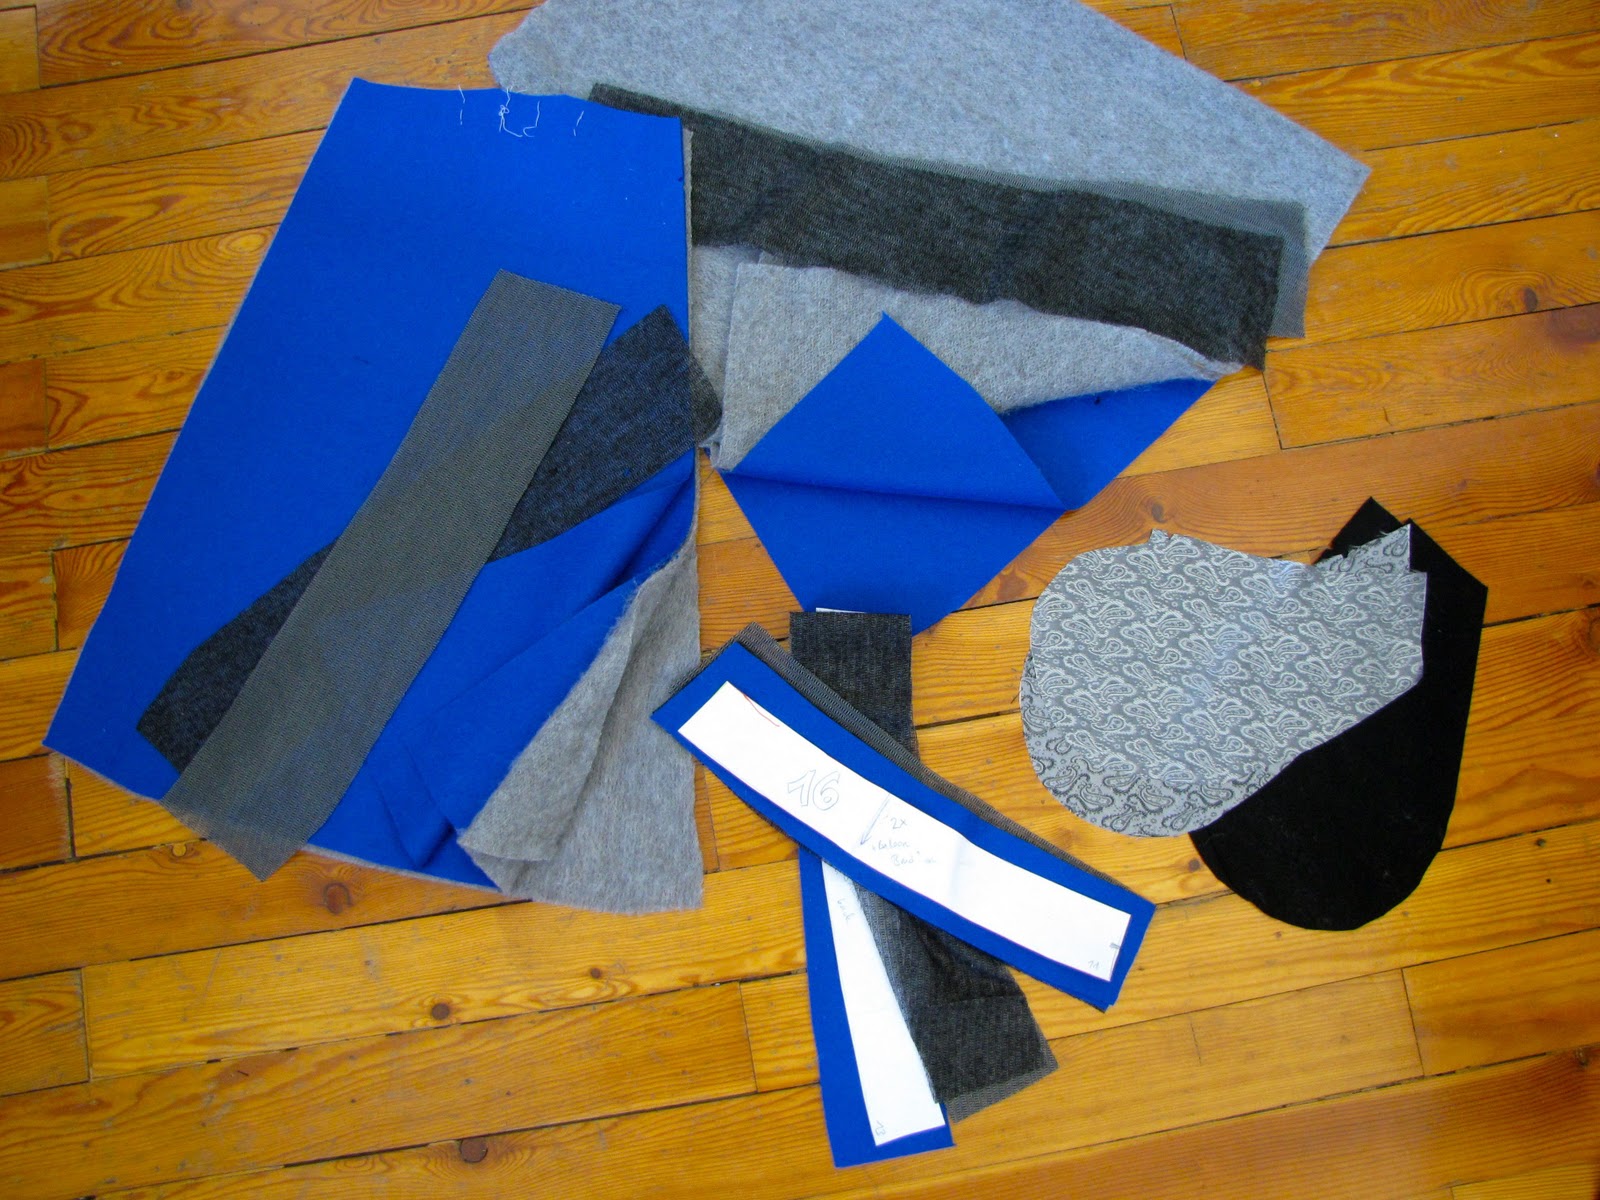
Day 5 (3/4 day): Making the Balloon Bottom
Cutting out the pieces took another forever. I cut the 3
pieces for the shell fabric, the
interlining - and what a drag that interlining is: Fuzzy hell! It was all over my
room, me and my shell fabric, fuzzy fuzzy fuzzy! Then some fusible lining for the
bottom parts of the balloon pieces, so they bulk out better, and what I call the
„balloon bands“ - three pieces out of shell fabric as well as fusible lining.. It was another extremely hot day in summer 2010 and ironing the fusible lining was just
cruel! My foot hurt like crazy and was totally swollen. Don’t ever step into
a needle, o.k.?!
As this was for the book, I was motivated to work very cleanly, so I decided to do real tailor's tacks, which was a first in my sewing "career" at that point. I always thought it was a waste of time and messed around with chalk, markers or pins, but really, tailor's tacks are worth it!!! No more guess work, no more hoping that the two pieces will be symmetrical...

These are my invented balloon bands, which were sewn to the bottom of the eased in coat and then folded under. They replace the need for an elastic, which I didn't feel like using in my coat, for whatever reason...

I made the pockets, sewed the coat bottom back and front pieces together...

...and sewed the top and bottom coat together. Yay!

The balloon bands are folded under and pinned to the coat at this point, which is why it is all crooked looking...

Day 6 (3/4 day): Collar, Zipper, Facing
Again cutting.... LOTS of pieces: For the collar 3 pieces: the
black shell fabric, fusible lining and the plush lining – another fuzzy hell!
Hair flying all over the place. Vacuuming alarm.
Same for cuffs, a total of 6 pieces (Shell, lining, fusible
lining for each), then what I call the zipper band (I want the back of the
zipper to be covered, so I won’t catch wool or fabric from my sweaters in the
zipper when I close it) out of black shell fabric and fusible lining, two rows
of fusible lining to stabilize the zipper, the sleeves each out of blue shell
fabric and interlining, fusible lining for sleeve caps and bottom of sleeves (so
they will poof out better, hopefully). That makes a total of 21 pieces. Ooof. At least the foot was getting much better (I had a day of no-sewing in-between...).

I believe sleeves aren't usually interlined, but I really wanted a warm coat, one that I could only wear a dress under to go to the theater, for example, and be warm enough... so as you see in the picture below: I interlined the whole darn thing!

I was having problems with the fusing. Needed to turn up the iron
way high to get any kind of fusing, and I know I should use a cloth between
iron and fusible lining, but I got even less gluing action. So I did it
without the cotton, and ended up with fuzz and goo all over my iron. Not sure if
it was glue from the lining or melted fibers or what. At least it came off the iron
quite easily once it was cool again...
 | |
| The stuff a seamstresses nightmares are made of... |
I had to redo the zipper about 100 times... first the two
sides didn’t show equal amounts of white, then the seams didn’t match up... The
problem was that due to the zipper band I added under one side, I couldn’t see
the edge of the zipper.... – Of course I also had an important day in my real job the day before and had too much alcohol and not enough sleep at night...
In the end I was pleased with the result and had to cut out yet
another 6 pieces and do more ironing of fusible interlining for the facing. You
cannot possibly imagine how hot it was here at that time - I had to be
careful not to overheat!
 |
| Close-up of the zipper-band: So the zipper is covered in the back and you don't get your clothes caught in it... |
Sewing the facing to the collar was tricky again and I had
to undo the first try. Thank God the fabric is forgiving. The pattern wants you
to sew the facing to the collar and shell all together, then put the
seam allowances down. That was way too bulky for my thick materials, and with my
mandarin collar it made more sense to only sew the facing to the collar lining
and put all the (other) allowances up into the collar, making it stand better
and not be bulky in the wrong places. It looked good once I got it right...

In the evening in front of the TV I made a sample for my
white band embellishment. It went quickly and easily and I liked the result. I
measured how much tape I needed proportionally to the length of coat and was relieved that I had bought enough, since I had taken everything they had
left in the store.

Day 7 (half day):
Finish facing, sew black band embellishment, re-cut sleeve cuffs, sewing
sleeves
I was much slower on day 6 than I had expected (I thought I’d
get to the sleeves!) and it continued the same way on day 7. Finishing the facing
was labor intensive, since I decided to ditch-stitch along the collar by hand
(because the facing was only attached to the collar lining...):

...and also hand stitch
along the zipper with running stitches, to get the many layers in shape.
It took about 2 hours but was worth it.

 |
Then I spent another hour hand sewing the black tape embellishment along the zipper
(maybe I could have done this in a different order, but I was making it
up as I went...). I believe it would have been too thick to get it allunder my machine...


Then another hour re-cutting the cuffs (the plush on the inside had made them too
tight) and sewing the sleeves to the cuffs as well as closing the sleeve seams:


Day 8 (half day): Finally - setting in the sleeves
The continuing heat was causing a slight low in my motivation to
continue this coat.... I did finally set in the sleeves however, which was easier than
I thought. First I hand-stitched the cuff-lining to the seam allowance, then I
set in the sleeves. I did re-sew a few places a few times, so it took a while,
because I really wanted the pleats to be placed nicely... Then I came up with a
sort of sleeve head/ sleeve cap booster thing, which really makes it look
better. I made it up from shoulder pads I had, added a layer of a quilted coat piece I ended up not using and a regular sleeve cap enhancement strip...
 |
| Look at those poor, bent pins... |

Here you see it sewn in:

...they are basically shoulder pads sewn into the sleeve caps, looking really weird this way, but I promise it worked!


I also broke a couple machine needles, but it
was my own fault and I was generally proud of my machine for managing this job! I was so happy at this point: the worst was over, the outlook of moving on to working with the lighter lining fabric was such a relief!
Whew! So in THIS next post, days 9-12 are the finishing touches: Lining, belt and embellishments!
And by the way, the BurdaStyle Sewing Handbook and my coat have still not found their way (back) to me. It is freezing cold here now and I would be SO glad to have it! How ironical is that!
My next post is another sewing project, and alas, after a long time it will be a vintage dress again! Hopefully in a couple days you'll see this pattern finished:

Best,
Katja

This looks like a LOT of work, but the result is totally worth it!!! Very interesting to see the pics.
ReplyDeleteAnd for the ironing, what kind of cloth you used? I wonder, because we usually use cheesecloth fabric for any kind of ironing :)
Wow. Your skill is amazing! I'm in awe right now.
ReplyDeleteI'm really excited you made it into the Burda book! This coat is gorgeous and you put so much wonderful work into it!
ReplyDelete