
As promised, here it comes, my next t-shirt-upcycling-project!

This one is a little less beach and a bit more elegant than the first project. Same basic idea though - an easy-to-wear jersey dress made from shirts I don't wear (anymore). I originally chose a different combination and meant to make something roughly like this:

As you see, first thing I did was cut through the middle of the two top shirts:

They were to become the bodice. I kept them as double layers, that way, there would be no hemming/edge finishing, which is a bit tricky with jersey:
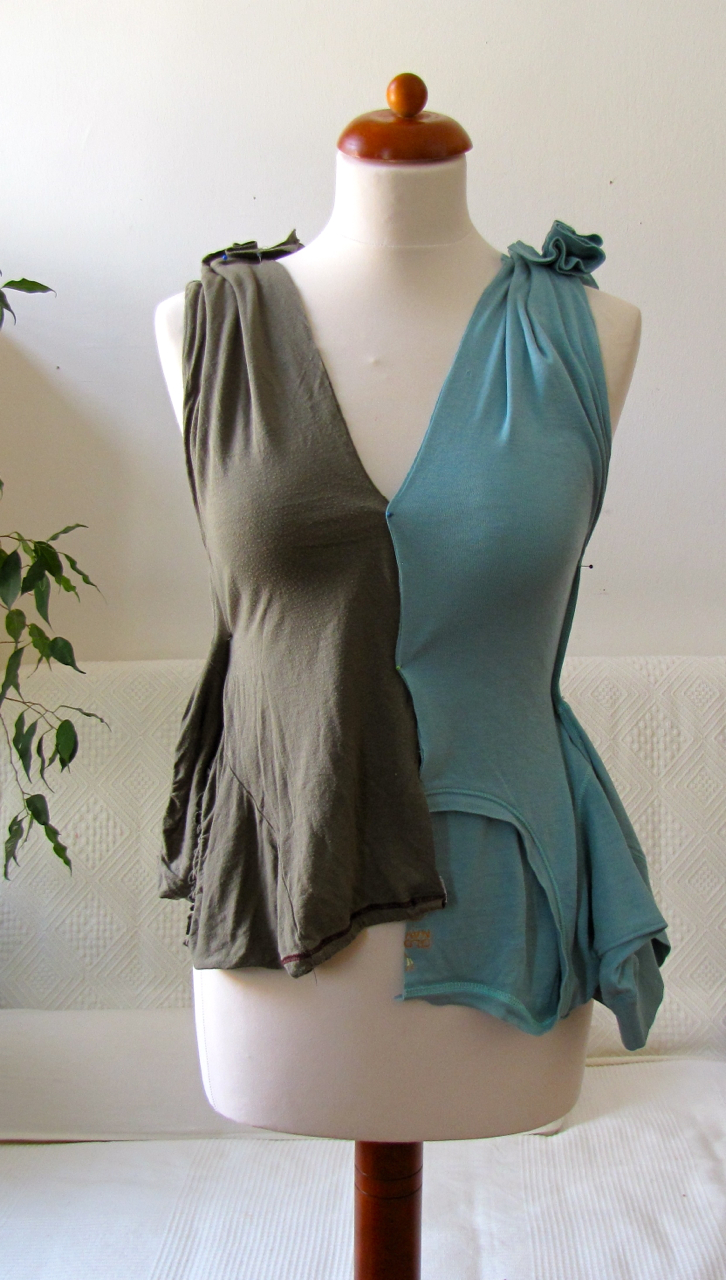
At the bottom you see the necks, the bottoms of the shirts are now at the shoulders.
Looking at it closely, I decided that the olive shirt was already too worn out to be reused.

I wasn't going to spend all the time sewing on something that would look old from the start! So a new fourth choice had to come in, and I went much bolder:

Maybe you even remember this from my BurdaStyle studio. It's a nice tunic I once sewed, but ended up wearing very seldom. I think the bold print is too much (for me), or maybe the problem is the short-sleeves with turtle-neck combo, which never makes sense weather-wise...

I went back to the dress form and decided to use the dark green as the skirt. It looked more balanced that way, and the width of the lighter green was just a bit tight around my behind anyway...
I cut off the top part of the tunic, only keeping the rectangle, which I just threw over the shoulder:

I loved the asymmetric look and that shape for a sleeve, so I kept it and went with it. This is also a double layer, basically like a pillowcase!
For the skirt, I cut the green shirts like this (as you see, I also kept the hem of the turquoise shirt):

This was to become the skirt - a waist band, a skirt part, and a narrower hem part to bring it all back in at the bottom.

I didn't want to keep the logo, so another spontaneous decision was to make that little pocket and sew it right over it. It also brings the different fabrics together nicely, and for that same reason I applied the turquoise band over the seam at the bottom:

Sorry, it was dark out at this time, and the pictures aren't in focus. This is the finished skirt part, with the top of it narrowed in to the width of the waist band (I had tried pleats, which looked really bad in the back!):

So back to the top part, I sewed together all open edges (again: the top parts are double layers, so no edge finishing at neck and armhole necessary!). The "sleeve" is actually left open at the bottom... I also decided to switch sleeve sides, partly because of the position of the pocket (both red pieces would have been on the same side), and partly because I'd rather have the sleeveless arm on my right...

After cutting off the top under the bust evenly I simply sewed the waist band to it. This is the back:

...and that's how it all came together... Another fast dress, the decision-process always taking up the biggest junk of time!

Oh, I used a bit of green for the top of the turquoise shoulder:

And as always: the back shot! :-)

There is a minimal amount of rippling going on at the seams. I used a serger and don't know if that could be prevented in any way. But then again, I am much more picky with my own garments than the ones you see in stores...

Aren't those shoes perfect with this dress?


Oh and once again a shot from my new favorite position: Sitting on the back of the sofa... not like I would ever sit there in everyday life, but oh well, it just looks good:


And this will be the next project posted:

Best to all of you, thanks so much for reading!
Katja
Very elegant transformation! Love it :-)
ReplyDeleteoh my gosh, i love this even more than the first one you made! the one bolder sleeve makes it just amazing! and it's fascinating to see how you came about your decisions, with all your documentation. nice work! :) lisa
ReplyDeleteGorgeous!
ReplyDeleteyou made some really interesting and daring choices here! and i love that you draped it all first. i usually just cut and keep my fingers crossed :-)
ReplyDeleteMe encantan tus proyectos, me parece una recuperación de prendas y una transformación alucinante.
ReplyDeleteThis looks so fabulous. I agree, the design/decision process always takes waaay more time than the actual construction!
ReplyDeleteReally gorgeous ! I love how the turquoise band at the bottom of the dark green shirt makes it like there are layers to the skirt. How did you sew the front turquoise and flowers top pieces together ? Is the seam inside the two layers or touching your skin, in shape of a dart ? (am I making any sense to you ?) Congratulations again !
ReplyDeleteI think I understand the question ;-) The seam is touching my skin in this case. I did a bit of hand-stitching to make it neat...
ReplyDeleteI just chanced upon your blog this afternoon, and I LOVE it! The ideas are so fresh, the execution so skilled and the poses such fun! ;) I want to try everything all at once, that's my problem... as well as spending hours reading all the posts! Thanks for sharing your cool ideas, you really have amazing talent.
ReplyDeleteOh wow, what a lovely comment, thank you so much! Well, I know the problem with wanting to read everything that's in the web, having too many ideas but not enough time. Just don't make the mistake of not trying anything at all. Start somewhere and it will take you to new places! Have fun!
ReplyDeleteIm so glad I found your blog (from Pinterest). I love your style and your information is really inspiring. Keep up the good work!
ReplyDeleteMust say that designs aside, you're damn sexy Katja!
ReplyDelete