


...had a former life as pants?

Quite a transformation, right? I'll show you some close-ups and then give you a full how-to!


The whole zipper/button part was left entirely untouched and became the back neck...:


An UPDATE!
I have been invited to contribute to the wonderful site refashion co-op, (also see the new button in my side bar) a site dedicated to giving old clothes a new life! I will be posting at least once a week, along with 99 other contributors. I love the site and I am thrilled to be an active member for as long as my ideas don't run out... This here is my first official contribution.
HOW TO:
The pants I worked with were a bit strange, carrot shaped, very small in the waist, pretty short legs (3/4 length), and pleats in the front, with side pockets:

However, I left the bottoms of the legs uncut:

I put it on my dressform for a first look:

I liked how the pockets were exactly where the sleeve holes would have to be:

...and I pinned down the waistband of the pants in a 90∘angle to form a boat-neck-like collar:

I draped around a bit and liked what was happening in the back:

But boy the front was a mess!

You wouldn't believe how long it took me to realize that I should just turn it around. This way, the former pants-back gave ample room for the bust:

Of course, if you think about a woman's shape, it makes perfect sense...

The zipper in the back also made it look less obvious that this top was made of former pants...

I cut out the pockets (just the lining):


...as well as the back down to the waist. At this point, I had no idea what I would do with the "tails", but I just kept going.

All basted, I was able to take it off the dressform and try it on for a first time:

I marked where I thought the armholes should be, and while my basting stitches were slowly coming undone, I realized I won't need all the stitched down draping on the sides. Instead, I would just tie together the pant-legs in the back:

I cut the arm holes:

Next, I sewed the basted neck line and the center back below the zipper, down to about waist level:

At first, I cut off the bottom of the pant legs in a sleeve shape:

...Thinking I might make short sleeves out of them. But I decided against it...

...so I cut the bottom of the pant legs off in a straight line. I also took off the center belt loop and put the top back on the doll for further decisions:

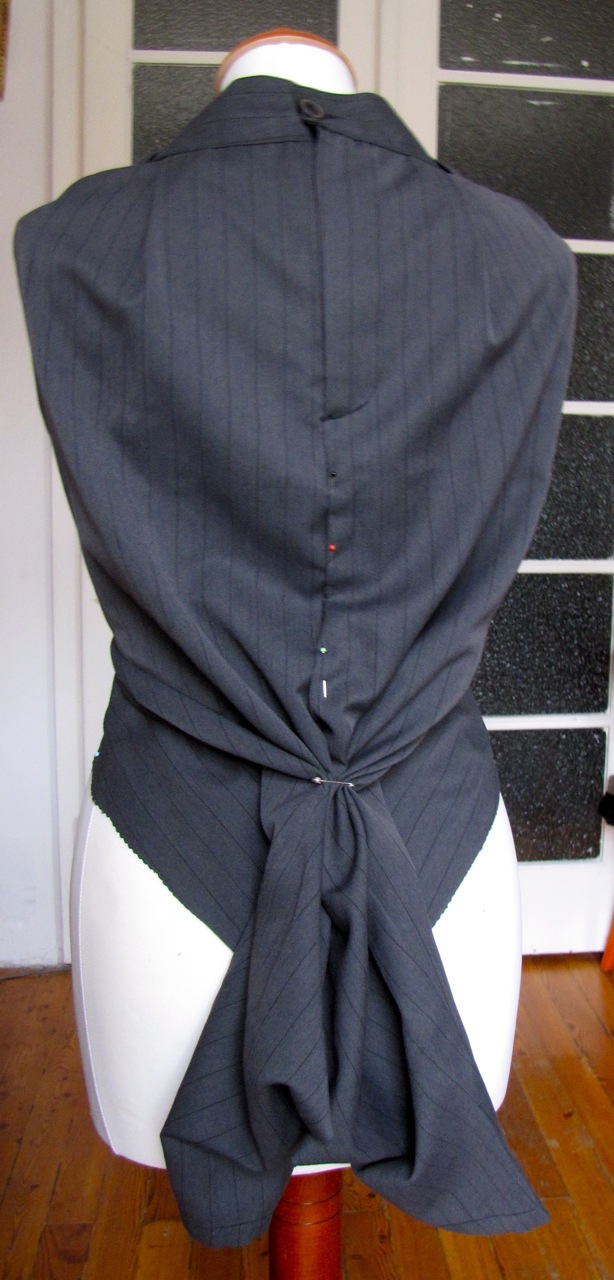
Here's a look at the back:

I pinned the insides of the back pant legs along the waist in the front:

...and marked where they met in the back - that was the point up to which I later sewed on the rib-fabric and the string, with which I decided to tie the "tails" together. This way, it wouldn't become such a huge knot in the back:


Then I attached the rib fabric to the waist, all the way to the point that I had marked earlier, where it met up in the back:

At the end of the rib fabric, I sewed in the strings:

You wrap it around to the back:

Then you cross the strings under the tails, oh, and as you see, the belt loop that I removed earlier is now sewn to the center back, at about waist level:

Pull one string through that belt loop in the back:

...and tie the strings together:

Voilà the front:

And here's the side view:

I admit, it's not the easiest top to put on (with all the crossing strings in the back), but once it's done, it's just pure coolness, at least in my eyes.

This is what it lookes like untied:

...and seeing this actually makes me want to cut up another pair of pants and come up with something new again... there is definitely top potential in pants ;-)

I hope this inspires you to turn some awkward looking garments into one-of-a-kind pieces! Let me know if you do and maybe we can link them all up in a little collection at some point!
Best,
Katja

PS: Up next: Second post on the "making-of" the Diva Coat!

great stuff !
ReplyDeleteThat is so incredibly cool. Kudos! (And thanks for the intensive making-of photos)
ReplyDeleteOne-of-a-kind piece indeed! I have never seen anything like it. I especially like the back (when wrapped) - looks stunning!
ReplyDeleteWhat a fantastic idea.
ReplyDeleteJust discovered your great blog! I love the topturned pants!! What a fun way to think outside the box!
ReplyDeleteHello, So creative, love your ideas, I will be following your blog in future. Pamela
ReplyDeleteWow!!! Fantastic!
ReplyDeleteoh my!!!! THIS IS AWESOME!!! I love this classic look but it is sooooooooooooo different as others!!! Great tutorial!!! Thanx for sharing. I pinned it on my pinterset...
ReplyDeletegreetings
miranda
What a great idea! It looks amzing!
ReplyDeleteWhat a great remake! You can only make so many skirts from pants , so this new take is inspirational!!
ReplyDelete100% fan, this is so cool, and that's so great to share. I'm bad at sewing but I so wish I could do the same ;D Good work ;D
ReplyDeleteAwesome! I actually kind of like how it looks untied too. And I love using the beltloops for a scarf. I'm definitely going to have to try this!
ReplyDeleteCool idea!
ReplyDeleteWaouh it's wonderful! It's a great idea and a great production! Congratulations!
ReplyDeleteThanks for the pic's; they showed me a/the version how even I could wear it!
ReplyDeleteAnd yes, you're sooo right: there's definitely quite some potential in pants (and they 'accumulate' at some places
to saddening stacks of 'unused wealth' ;-) !)
Greets,
Gerlinde
Congrats to the invite to refashion co-op
I am so happy I found your site. I absolutely love your work.
ReplyDelete