Welcome to a new category on my blog: The no-sewing-machine projects!
I am away from home for a few weeks and don't have a sewing machine at hands. While I try to improve my drawing skills, I still can't quite survive completely without some kind of fabric or yarn between my fingers... :-)
So I made this cuff:
The base is a kind of wire mesh I got at the DIY store, I don't know what it is really called in English, nor what it is originally meant for... You will need metal shears to cut it in shape:
Friday, March 16, 2012
Sunday, March 11, 2012
The "Vintage-Inspired, Modern Style" Design Challenge!
Well well, wasn't this contest right up my alley!?
BurdaStyle has organized a contest, see rules and information HERE. We were to take an existing pattern and make our own variation from it. There were plenty of different patterns to choose from, amongst them four vintage patterns free of charge! The one that jumped right at me upon very first glance was the "Slip-On Jumper Dress".
Labels:
burda,
BurdaStyle,
dress,
finished projects,
free pattern,
how-to,
jersey,
pattern,
recycling,
sewing,
sleeves,
vintage,
VintageModern Design Challenge
Wednesday, February 29, 2012
Fab Coat Now Wearable!
Here it is, my February contribution to the Refashion co-op!
I would say there are two categories of refashion projects:
I would say there are two categories of refashion projects:
- The ones you make out of items that are just not fashionable anymore the way they are.
- The ones you make with garments that don't fit anymore (or that need mending...).
Labels:
coat,
recycling,
refashion,
refashion co-op,
sewing,
upcycling,
wardrobe refashion,
winter wardrobe
Saturday, February 25, 2012
The 1938 Dress: Tutorial Snap Button Closure
Here it is, the last post about the making of my 1938 dress, and what you see in the picture below is the side with the button closure:
Nice, right? Actually so much better than a zipper!
Normally, I would have opted for a zipper, for whatever reason. I guess I would have found it too much of a hassle to sew snap buttons and I am more familiar with sewing zippers. However, my decision to look up this technique also had to do with my mission of using up my stash/notions/whatever-clusters (I have TONS of snap buttons, but NEVER the right zipper at hand), as well as kneeling myself deeper into the real reason why I sew vintage - to LEARN stuff...
Labels:
1930's,
1938,
dress,
how-to,
sewing,
snap button closure,
snap buttons,
the 1938 dress,
tutorial,
vintage
Friday, February 24, 2012
The 1938 Dress: Making the skirt
On we go, today, we are making and adding the skirt!
This is not a real tutorial post, but I wanted to show you how this pattern works. I find it quite interesting, as there is a bunch of gathering right in the center front of the skirt, which adds nice width, while keeping the silhouette narrow from front and back. I actually sewed a vintage pattern with this kind of skirt before, but I altered it back then, because I couldn't imagine that this bunching up right between my legs would work out... :-) This time, I went for it, and I like the result!
This is not a real tutorial post, but I wanted to show you how this pattern works. I find it quite interesting, as there is a bunch of gathering right in the center front of the skirt, which adds nice width, while keeping the silhouette narrow from front and back. I actually sewed a vintage pattern with this kind of skirt before, but I altered it back then, because I couldn't imagine that this bunching up right between my legs would work out... :-) This time, I went for it, and I like the result!
Thursday, February 23, 2012
The 1938 Dress: Finished! Vote and Win!
So this is the finished dress from my 1938 magazine:
Monday, February 20, 2012
Broken Zipper Solution: From "Oh-No!" To "Oh-Yes!"
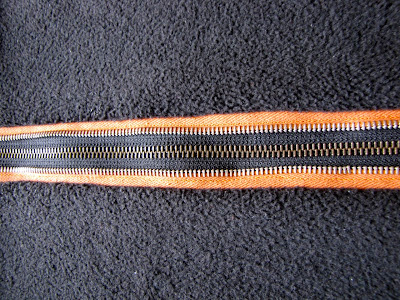
With the facing and bias-tape binding it would have been such a pain to take the zipper out and put a new one in, so I was in need of a clever plan B. It came to me, and it's one of those super easy solutions that one fails to see sometimes. At least I think so. I simply attached the new one to the old one, adding a bit of zipper coolness...:
Labels:
cape,
finished projects,
free pattern,
jacket,
pattern,
quick projects,
repairing zippers,
sewing,
tops,
Vest,
winter wardrobe,
zipper,
zippers
Subscribe to:
Posts (Atom)


